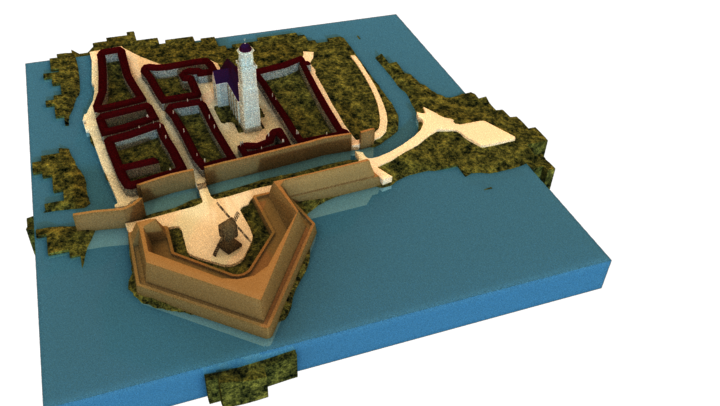
It's funny how I keep making these posts when I'm in Ghent and not at home. Clearly my productivity spikes every time I move to this city. I should be here more often, I would make great progress! Anyways, without further ado, below a wall of Facebook-esque proportions.

A tiny stab at my previous blog post. This is what I ended up with after some tweaking inside Arnold and Maya. I was quite happy with the result of the render even though there was still a LOT of noise left in the render. I figured I'd up the anti for the AA multiplication render setting and leave the rest of the camera multipliers as they were. While doing this I also downgraded the number of passes for all the lights and set up my scene using various references and ultimately also a number of AOV's. (render layers). Unfortunately my render times exploded and I found no way to decrease them to an acceptable amount.
Switching from Arnold to VRay:
I discussed the problem with my supervisor and he suggested I'd forget about Arnold and started using VRay for the bulk of the rendering. This way he could also help me out and actually practically supervise me. I thought that was a pretty good idea. Another thing we discussed was cutting the 20 second shot into several parts so a) it will be a more interesting combination of shots that may or may not actually tell a short story, b) added difficulty by forcing me to set up a coherent folder structure that allows for quick iteration, c) increase the workload since according to my supervisor I am racing through it and d) provide a compositing challenge by requiring different ways of image merging.
This is the original 20 second shot. In this case I cut it down to about 14 seconds because track wasn't perfect yet. It yanked the scale model down for a short moment and I didn't want to show that in my presentation. Normally a track would be perfect after shooting something like this and making notes regarding focal length, shutter speed, etc. Unfortunately though my camera lens was featuring zoom creep at the time and slid my focal length from 28mm to 32mm without me noticing. Really tricky to figure that out once you're in PFTrack.
After a few iterations with cutting up the shot, playing around with camera angles and mixing up the timing of the different shots I figured I wouldn't want to spend more time on that. Getting my angles right and camera's to look interesting was a lot of fun but there was also a lot still left to do. I wanted everything to be as complete as possible so I also rewrote the script, drew a whole new storyboard with notes regarding VFX and sound as well as create an animatic; something I didn't need to do before as there was only a single shot.
Animatic:
This is the third version of animatic. The previous two are view-able on my YouTube channel also, though I've cluttered them with so many annotation it's probably not a lot of fun watching those. I know you can turn those off, but still; they're just less OK versions of the one above.
So after getting all these camera's in order and the timing okay I figured it was time to jump into VRay. I follow a few tutorials and shredded the support file so casually made available by ChaosGroup. I ran into a few issues here and there with the VRay buffer and its color management, but eventually found my way around most things and managed to get a similar result to the Arnold render all the way at the top. Transferring the shaders gave a few issues as some nodes I had used in the Arnold shaders were not available in VRay, though that was solved fairly quickly also. Not a lot of set-backs in this transfer from Arnold to VRay as they're quite similar in the end. I do LOVE the light cache setting for VRay though and I wish Arnold had it. This is shaving off so much of my render time. Anyways, without more talk-a-doo, here are some images.

Simple Physical Sun and Physical Camera setup.

Same as the above including a directional light that provides for the shadows.

Same as the above but with preliminary shaders. I wasn't happy with the pale discolorations. Took some time before I figured out how to get rid of those but managed eventually.

Discolorations gotten rid off and a very simple reflection shader to calculate render times in VRay. The light artifact on the floor plane is negligible as I will be turning off its primary visibility in the final renders. It will only serve as a shadow catcher.

The soil seems very reflective in this though for some reason its actually VERY light subsurface scattering attribute that's causing the highlights. I have since turned that off and it looks much better.

Similar setup to the second image, but this time with a Physical Sky; hence the blue reflections.

Crazy render featuring buggy color management in the VRay render buffer. I was stuck on this quite some time without actually knowing what was going on. Silly VRay.
HDRi lighting:
After testing this Camera and Lighting setup for about a day I wanted to insert the HDR image I had prepared for my Arnold lighting scene into this VRay scene. For some reason I had to pump up the exposure settings for this map through the roof and I still don't know why, but the results are pretty good.

Added my HDR image with an exposure of 1.0

Exposure: 3.0

Exposure: 10.0

Exposure: 14.0
I also changed the location of the light a little bit to see whether the shadows and highlights would eventually complement the model opposed to make everything look pale and bland. I also changed the hue emission of my HDR image to a more blue light.

At this point I figured out why my chrome ball wasn't working. I also changed the location of the Sunlight emitter as I felt the shadows weren't working in favor of the model.

Another change of location of the Sunlight emitter. I quite like the placement of it here, It also resembles the bulk of light that comes into the actual shot footage.

Added ambient occlusion against a few seconds of render time. The amount of time added to the total render time per frame is only a few seconds and for that it adds so much to the scene. I was really surprised this was the ting that kept my render feeling flat and boring. I like it much better now.

Camera settings.


My current render settings. They're fairly straight forward as VRay needs very little input to output an excellent render. The majority of the personality of the render comes forth from the HDR image I've put into the Skydome but since that has such an incredibly large parameter window I'm not going to attach it to this blogpost. It's seriously so large I had to screenshot it ten times to be able to capture all those settings.
Fluid Simulation in BiFrost:
Before I really did any of the stuff above I had been playing around in BiFrost and getting some nice results using simple boxes and low particle counts. At that point I felt my consumer grade workstation would provide for enough power to run a few stable simulation in Maya 2015 using BiFrost. I was wrong though. I spent about ten frustratingly slow, unproductive and inefficient days on BiFrost before finally giving up on it. Either my workstation or the software were not ready for this kind of use, while both really ought to be.

A quick and dirty representation in BiFrost that actually came really close to what I wanted it to look like. At this point this has only a single liquid emitter with many parameters left at their default settings. However, at this point already (frame 30) it took around 1 a minute to simulate each frame; much longer than it should take really.

7m26s to incompletely render a particle system using Mental Ray.
This brings me to another problem I couldn't figure out, but maybe someone reading this may know the solution to. Once I rounded up my simulation I didn't want to keep it in cache so I created cache files to my drive. However, once I did this I wasn't able to mesh the particle system anymore, so I was forced to render this in Mental Ray. The other way around, when I did start meshing the particle system before I wrote it to my disk I ended up with a shortage of RAM as doing both these operations simultaneously is incredibly heavy. I still can't find the solution to this.

Add reflection, refraction, ambient occlusion, a shadow catcher and a scene that needs to be visible in the semi-opaque water and it goes well over 20 minutes per frame. Unfortunately I don't have that kind of processing power, nor do I have the RAM and drive space necessary to render out files the size of what this was putting out.
At this point I committed to all the aforementioned steps excluding BiFrost and Maya 2015. I spent the holiday (autumn) 'rebooting' this project in a state that would actually be interesting to see and more challenging to complete. Doing more shoots for clean plates and preparing a proper folder structure was part of the challenge. Eventually I figured it out in eight days and am currently a week behind on schedule, though that should not be an issue as I've not accounted for the Christmas Holiday in my working schedule. This should give me plenty of time to get back on track.
Fluid Simulation in RealFlow:
So after the BiFrost fiasco and all the additional work I had given myself a little more time to prepare for what is actually required for simulations. Emitters, colliders and environment factors. Realflow seemed the easier and more straightforward way of working so I followed a tutorial called 'Introduction to Realflow' by Digital Tutors. Thus far, the results have been pretty good and I'm glad I've switched to this program.
This is the result of some quick and dirty fluid simulating in Realflow. I've spent half a day on getting this result and made enough mistakes to do it right next time. I'm glad meshing, exporting and stitching the alembic caches turned out so easy, though I'll be getting to that later.

As you can see from the viewport in the right bottom part of the image I only used 5 nodes for the completion of layout for this scene. It managed to calculate the path of all particles along the sculpted river within 10 minutes and was much more accurate than BiFrost was. As long as the mesh is triangulated I have yet to have any funky results in RealFlow.

The meshing is also fairly easy, though it does require some iteration. Once you have the right settings though it's a walk in the park. In some cases it may need a differentiation of about 0.001 to the polygonal size or the filtering, but usually these settings can be kept the some across all scenes.

This simulation is a little more demanding as it was difficult to have to river flow through each bridge. What I've done to solve it is simply add more emitters that I manually activated once the particles from the previous would reach its location. It's a tacky thing to get right, but from the camera angle I'm using it's completely obstructed so I'm getting away with it. :)

Meshing of the simulation above. Though the fluid is way to thick there's an easy way to fix this by reducing the viscosity of the fluid. By default this is set to 3.0, which resembles substances like mud and gooey fluids. Water, in this case, has a far lower viscosity. For future reference, I'm using a 1.0 viscosity in all my later simulations.

This bring us to exporting. RealFlow has a great exporting system which basically exports everything as you simulate it. The best thing to do is, once your satisfied with your simulation you reset your scene and go into Export Central. Check everything you want, include naming your files and export locations. After that, just hit simulate and it starts writing everything to your disk. It's absolutely fantastic.

Realflow, for a reason I read somewhere on the internet but probably still don't fully understand, doesn't create a single alembic cache but creates one for each frame. This tool, simply situated in the RealFlow shelf, stitches those together into a single file so you can use that in Maya or any other application that allows to Pipeline Caches. Again, it's really awesome.

So far, this is the first result of a render and I quite like it. It's not really water nor is it really gooey, though I think due to the scale of it, it may really fit the scale model. I'll be testing this at the end of the day. The great thing right now is that this cache only takes 11 seconds to render entirely at 1280x720 and as long as each frame stays below 1m30s for the water I am a happy camper.
That's it again. A lot this time. Hope you enjoyed reading all of it.
Pim
ps. Asterix is almost here! Weeeee