Wednesday, September 18, 2013

Red Skull Character Sculpt

I picked up on the character sculpt from a little while ago. I believe it was the 6th of September when I touched Zbrush for the real first time and I've consistently felt more and more comfortable using it to the point where I'm right now (read; I feel very comfortable with my tablet).

Today I worked on getting my Dynamesh sculpt from the bulky mess it was to a well structured and well proportioned mesh in which I am using polygroups and various new materials I had the privilege of receiving from a fellow student.

My progress for the day.
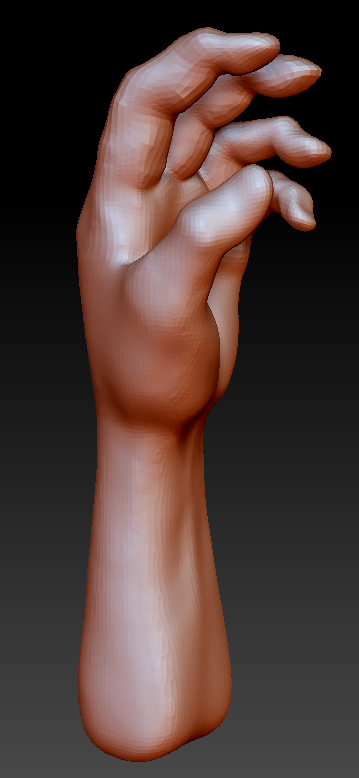
The back has given me so much more trouble than I anticipated. For every muscle I blend in another feels awkwardly posed; continue this pattern until you find a compromise. Tomorrow should offer enough time to fix the back and get started on the legs. I'll be replacing the stumps at the end of each arm with an opened version of the hand I created earlier.

Also, after playing some pool I decided to snip some screens and paint over them using other reference than I've been using today so maybe I could figure out why some shapes were bothering me more than others. Results are below.


Kind regards,
Pim

Thursday, September 12, 2013

Hand game model

Today I baked the normal, cavity and ambient occlusion map using Xnormal and fixed some of the losses of volume in the hand when I rebuilt it in Maya. After a visual comparison I decided the maps would do and I continued to polypaint my Zbrush model.

During polypainting I found that using the standard brush left me unsatisfied with how the skin looked. It resembled the material definition of a plastic bag pulled over -in this case- a hand. So I changed brush to the ClayTubes brush and started applying a 'van Gogh'-like way of texturing; continuously softly hitting my tablet. The results were way better.

Comparing volumes.
Left model: 1.8k tri's | Right model: 2,000k tri's

Results of polypainting.

I used different functionalities within Zbrush and various programs to export my polypaint to a texture map and found that using the GUV tool in the UV Map menu worked best and most stable. It creates a temporary UV set for the high resolution model which you can use to project the polypaint to. Then flip the vertical vector and export. After that add it to Xnormal and bake the base texture. Voilá.

Mental Ray render.

I'll be working with Houdini FX for the rest of this week.

Kind regards,
Pim

ps. Video made in Marmoset Toolbag to retain the 'game' aspect of the model.

The artifact is something I get when I record 1/1 using the Marmoset video recorder.
1/2 fixes it though, but the resolution is cut in half.

Wednesday, September 11, 2013

Hand sculpt finished

I finished up on the sculpt this afternoon and started playing around with Zremesher but found it frustrating to work with. The Zcurves are a wonderful thing but they produce a model with strangely circling edge loops that run across the entire length of a cylindrical object (like the fingers and wrist). Although I tried many times to add more Zcurves to get rid the spirals they persisted on even the lowest polycounts. It also gave me uneven rows on the front side of the fingers that ended up with ugly triangles causing light to bounce off at an unnatural angle.

Finished hand sculpt at around 1 million triangles.

Deciding which polycount would retain the silhouette best.
Left to right; 1.2k to 4k triangles.

So what I ended up doing was importing the high poly model at a few levels lower and constructed a mesh around it using Maya 2013. Below is the finished low poly model. It's around 1800 triangles; well within the polygonal limit for this assignment.


Kind regards,
Pim

ps. added picture for Zcurves (maybe I'm doing it wrong)

Tuesday, September 10, 2013

Sculpting a hand (continued)

Decided to continue working on the hand I presented in my previous blog post.

I was working with dynamesh but since  more control = more better, I decided to work with detail levels. So I ran the model through Zremesher (also to clean up some of the triangles; they were giving me a hard time). Then sculpted over the entire surface to increase muscle tension, tendons and pointy bone structures. And finally cleaned it up.

Right now I'm still not entirely satisfied with how the proximus phalanx of the thumb connects with (close to) the wrist in the fourth picture. The bone seems to have a weird angle there. Will fix soon.


I haven't made any progress on the big guy but as soon as I finished this one I'll continue with that.

Kind regards,
Pim

Friday, September 6, 2013

Sculpting a hand

I've been putting this off for a very long and I've filled my time with all the other retakes I still had to do... but as of this week it is really happening. I'm going to use Zbrush and I'm going to feel comfortable using a drawing tablet before the end of next week.

So far I've been mostly just playing around in Zbrush with shaders and basic proportions for limbs. My room mate Frederik has been an amazing help with that. For next week I need to finish a hand; sculpted and optimized for a game engine. So far I've spent a few hours on getting the proportions right but I'm noticing I'm gaining speed.


Next to this I've started working on a full body model because for the end of this Block I need to have created a character optimized for a game engine. I've chosen Marvel Comics' Red Skull to recreate. I've seen 3D Total have done an incredible rendition of his persona but I'm tempted to not go for the hyper realism they've presented him with. I really like the 'Ultimate Red Skull' created by Leinil Yu and printed in Ultimate Comics: Avengers #1.

Below is my progress. As far as I understand Red Skull has cloned Captain America's body and placed his own head on it. This is easier for me as I can simply use an athlete's body. It is still very very wip.


 Some of the stuff in this sculpt (skull) was not my work.

More stuff to come.

Kind regards,
Pim