Some time has passed and since I didn't write anything last month I figured I'd give it another go. During these past few weeks it has become clear that the production I have been working on is on schedule and will air in French cinema's around November 27th. So as far as I know I am totally allowed to tell you what it is! Yay!
So I've been working on "Astérix: Le Domaine Des Dieux"; in English "Asterix: The Mansion of the Gods". Unfortunately the IMDB page is empty but there's an unofficial Facebook page which you can go ahead and like. At least I think it's unofficial... I'm not sure... Oh well. Here are some promotional posters.


So in my last blog update I wrote about duplicated curve projections on a procedural landscape and some problems that arose with the technique I used. Firstly it wasn't entirely procedural and secondly it featured a gigantic node system; one that could be easily fit into multiple Digital Assets. Below a duplication of what my comments were on the progress I had made and how I addressed them with the help of a colleague and friend.

In the copy node above I output 7 curves which I blend between a blendshape node like you would in Maya, however each curve of my output will be added to it's own separate group. Using a blast node I can now select the copyGroup I need and delete the rest (non-selected). This will then allow me to measure the curve along it's length and apply accurate UV's onto a sweeped mesh. This happens later.

This turned out to be a different issue than I had first anticipated as it didn't just incorporate the sweeping distance; it would also incorporate the size and shape of the trench. In the first image of the previous paragraph a solution is already present in the shape of a trenchnet digital asset.
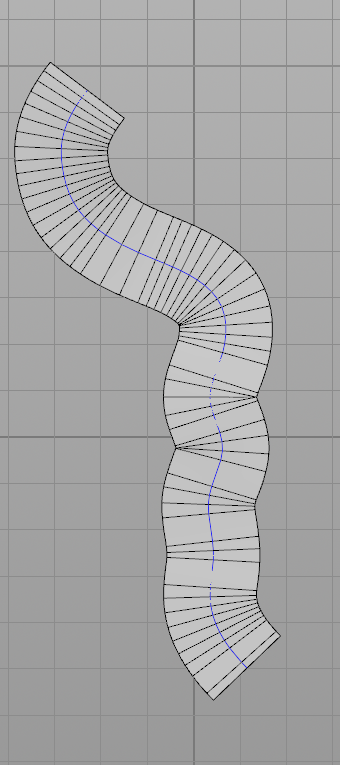
I used an L-system to create a curve that would allow me to duplicate it along a resampled curved but with the premise that the L-system curve's size would be the same as the distance between two adjacent points on a resampled curve. I achieve this by adding a transform node that uses the following expression in the Uniform Scale attribute:
(1/bbox("../lsystem#",D_YSIZE))*ch("../resample#/length")
The first part normalizes the bounding box volume of the L system and the second part multiplies it with the edge length determined by the resample node. Then I add normals, copy the l-system along the curve and clean up until I have something I desire.
Below are some examples of the shapes it can take on in it's current state of development. I'm contemplating whether I should add a few more functions like degradation and additional offset, but for now I'm satisfied.


A three dimensional result of the above with a sweep looks pretty sweet.

This is one where I had to do the exact opposite and increase the reference instead of decreasing the size of the selection to avoid it taking point positions from a location that was not correct yet.
The solution was to take the curve that creates the height of the reference mesh and increase it along it's own normals by creating a vector between the last and second-to-last point. This is high school math where using an if statement (compare node) calls both the top result as the one below as an output. The normalize node at the end makes sure that we're extending the normal of the curve at the same rate.


This one... I didn't think this through as it's not something I would like to have. I think it would be much better to use the bounding shape of the trench to sweep across the curve and act as a smoother for the landscape than to have a whole general area that flattens everything. Not a fan of this idea anymore. Going to do it differently.
For now the most difficult step will be to find a way to have all the different trenches connect to one another. I will definitely update this blog as soon as I have a solution for that... And that was it for Houdini. But I did do some other stuff also!
I can't keep my hands off of Arnold. Such a great rendering tool. Even crappy light setups can turn out to be great physically correct calculations. I also discovered this amazing website with free high quality models ready for everyone to render.


I specifically want to add that the two renders above are not an exercise in my lighting capabilities but more of a test whether I want to use Arnold for my graduation phase. I'll be starting my specialization soon and I'd like to know some render engine specific things before I even start researching software and hardware packages.
Anyways, that was it. Thanks a lot for reading!
Pim
ps. Arnold coming to Houdini? The best of both worlds? GWAAAAAAaaaaaaa
No comments:
Post a Comment